Plug-In Wall Sconces: Renter-Friendly Lighting Without an Electrician
How a plug in wall sconce works, where to put it, how to hide the 6–8 ft cord with channels and paint, swing-arm versus fixed, and a step-by-step install that takes twenty minutes and leaves two screw holes.
Key takeaways
- A plug-in sconce is a standard wall light with a 6–8 ft cord and inline switch; it mounts on two screws in about twenty minutes
- Route the cord straight down inside a paintable channel and run the horizontal leg behind furniture along the baseboard
- Bedside swing-arms sit with the shade bottom 30–36 in above the mattress; general wall sconces center at 60–66 in from the floor
- Use a swing-arm for reading and a fixed shade or globe for ambient light, with 2700K CRI 90+ bulbs and a plug-in dimmer
A plug in wall sconce is an ordinary wall light fitted with a 6–8 ft (1.8–2.4 m) cord and an inline switch, so it mounts on two screws and draws power from a standard outlet. Installation takes about twenty minutes, needs no electrician, costs $40–150 per fixture and delivers the same 300–800 lumens as a hardwired sconce. The only real work is deciding where the cord goes.
The question renters and quick-fix homeowners ask is whether a sconce plug arrangement can look built-in rather than improvised. It can, if you understand how the fixture is put together, plan the cord route before you drill, choose the right arm type for the spot and follow the mounting steps in order. This guide runs in that sequence.
How plug-in sconces work
A plug-in sconce is mechanically identical to a hardwired one; the difference is that the two wires exit the backplate as a cord instead of terminating in a junction box. Inside the fixture sits a lamp holder, usually E26 medium or E12 candelabra in North America and E27 or E14 elsewhere, a shade or diffuser and a metal backplate or bracket that carries the weight. The cord is typically a flat two-conductor lamp cord, 18 gauge, rated for the 60 W or less the fixture will draw, with a rocker or rotary switch 12–24 in (30–60 cm) down its length.
Because the wiring is a cord, the fixture is regulated as a portable lamp rather than a fixed luminaire in most markets, which is why no electrical permit or licensed installer is required. It plugs into any standard receptacle and draws little: a 9 W LED bulb pulls less than a phone charger. Good practice is one sconce per socket and a slim right-angle plug so a nightstand can push back against the wall.
- What you get: a fixture, a cord with switch, a mounting bracket or keyhole slots, screws and often plastic anchors.
- What you add: a bulb (buy 2700K, CRI 90+, 300–800 lumens), a cord cover kit and, if you want dimming, an inline LED dimmer or a smart plug.
- What it costs: $40–150 for the fixture, $10–25 for a cord cover kit, $15–40 for a plug-in dimmer.
- What it leaves behind: two screw holes, or nothing if you use a rated adhesive hook for fixtures under 3 lb (1.4 kg).
Many designs are sold in both hardwired and plug-in versions, the plug-in one usually 10–20 percent cheaper; a sconce plug kit, a cord with bare leads at one end, converts some hardwired fixtures. For a full comparison of the categories, see Wall Sconces: Styles, Placement Heights & Room-by-Room Guide.
Hiding the cord: covers, channels, painting
A visible cord is the only thing that gives a plug-in sconce away, and a paintable cord channel makes it disappear for under $25. The cord almost always has to travel down from the fixture to an outlet 12–18 in (30–45 cm) above the floor, a drop of 3–5 ft (0.9–1.5 m), and that vertical line is what you are hiding.
- Route straight down. Run the cord vertically from the backplate to the baseboard, then horizontally along the top of the baseboard to the outlet. Avoid diagonals; the eye forgives a plumb line and reads a slant as sloppy.
- Use a self-adhesive channel. Half-round or D-profile PVC cord covers, about 0.5–0.75 in (13–19 mm) wide, come in 4–6 ft (1.2–1.8 m) lengths with elbows and end caps. They stick to painted drywall and plaster; on textured or limewashed walls, use the low-tack tape supplied or a removable mounting strip so the finish survives when you move out.
- Paint the channel. Prime the PVC with a bonding primer and brush on the wall color in the same sheen; matte and eggshell hide the channel best. Do this before it goes on the wall, then touch up the joints in place.
- Hide the horizontal leg. Run the cord along the top of the baseboard or in the shadow gap behind a nightstand, sofa or console. A cord that disappears behind furniture at the bottom of a painted channel is, at normal viewing distance, invisible.
- Consider a fabric-covered cord. Twisted cotton cords in a color close to the wall or to the fixture finish are the alternative when a channel is impossible, such as on a brick or stone wall. They read as intentional in the way a rubber cord never does.
Two things not to do: never run a cord under a rug, where foot traffic wears the insulation, and never staple through or pinch a cord behind trim. For a wall with no outlet in reach, a battery fixture is the fallback; our guide Battery-Operated Wall Sconces: Do They Actually Work? explains the brightness trade-off you accept.
Best spots: bedside, reading nook, above art
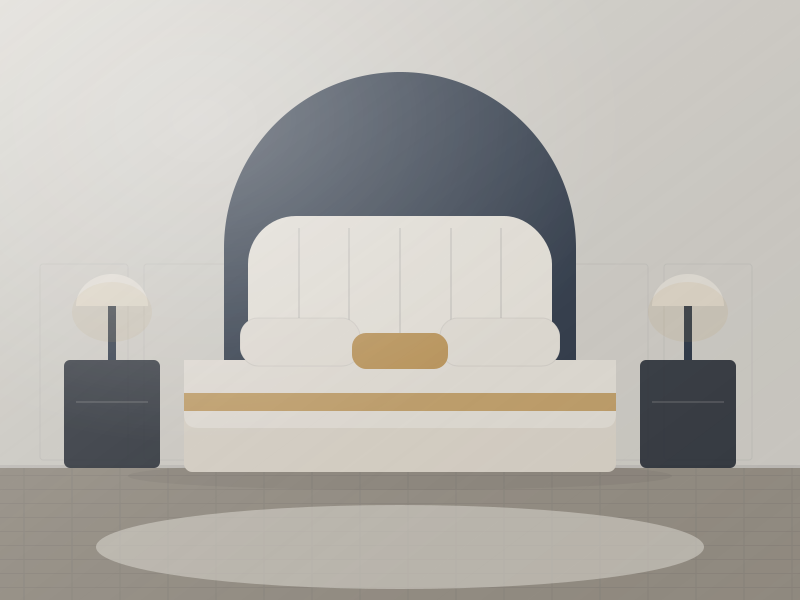
Plug-in wall lights earn their place wherever an outlet sits within cord reach of a task that wants light at eye level, and three spots account for most installations. The bedside is first: plug in wall sconces for bedroom use free 12–14 in (30–35 cm) of nightstand and let two sleepers read independently. The reading chair is second, and art is third.
| Spot | Height to fixture center | Horizontal position | Arm type | Bulb |
|---|---|---|---|---|
| Bedside reading | Shade bottom 30–36 in (76–91 cm) above mattress top, about 54–60 in (137–152 cm) from floor | 6–12 in (15–30 cm) outside mattress edge | Swing-arm, 20–30 in (50–76 cm) reach | 450–600 lumens, 2700K, dim-to-warm |
| Headboard accent (pair) | 60–66 in (152–168 cm) from floor | Centered above nightstands | Fixed shade or globe | 200–350 lumens, 2700K |
| Reading chair | 50–56 in (127–142 cm) from floor | Behind and 6–10 in (15–25 cm) to one side of the chair | Swing-arm or adjustable head | 450–800 lumens, 2700–3000K |
| Above art | Head 4–8 in (10–20 cm) above frame; usually 72–80 in (183–203 cm) from floor | Centered on the frame | Picture light, head half to two-thirds frame width | 200–400 lumens, 2700K, CRI 90+ |
Plug in wall lamps for bedroom use work best when the outlet is behind the nightstand, which puts the whole cord drop out of sight. In living rooms, plug in wall mounted lighting flanking a sofa at 48–54 in (122–137 cm) replaces two table lamps; the cord drops behind the sofa arm and along the baseboard. In any room that has only a ceiling fixture, which is most rentals, a plug in sconce light on a smart plug becomes the second layer so the overhead can stay off; how to layer lighting covers the ambient, task and accent split.
Swing-arm vs fixed
Choose a swing-arm for any sconce that must light a task and a fixed sconce for anything that provides ambient glow, because an adjustable wall sconce puts light where you need it and a fixed one puts it where the designer decided. The two look similar on a product page and behave completely differently in a room.
- Swing-arm. One or two articulated arms give 12–30 in (30–76 cm) of reach and 90–180 degrees of rotation; the shade tilts on many models. This is the right choice for bedsides, reading chairs and desks. It weighs more, 3–7 lb (1.4–3.2 kg), so it needs a stud or a proper anchor, and the arm should fold back flat against the wall to under 6 in (15 cm) when not in use. Plug in wall lamp sconce designs with a metal or linen drum shade are the most common form.
- Fixed. A shade, globe or up/down cylinder on a short stem or a flush backplate. Projection is 4–8 in (10–20 cm), weight 1–4 lb (0.5–1.8 kg), and it hangs from keyhole slots on almost anything. Use it for wall wash in halls and living rooms, flanking a mirror or a headboard for symmetry, and above art. Plug in wall lamp lighting of this type comes closest to looking hardwired once the cord is channeled.
- Adjustable-head fixed. A fixed stem with a pivoting head, 4–10 in (10–25 cm) projection: some aim without the visual weight of an arm, for a reading corner where the chair does not move.
Whichever you choose, insist on a switch within reach from the bed or chair, on the cord 12–24 in (30–60 cm) from the fixture or on the backplate, and specify a bulb no brighter than the shade can hide; an exposed 800-lumen source at eye level is unpleasant however good the fixture.
#DDE3D3#F2EBDD#B08D57#3A3A38Finish-wise, the pairing that works in almost any rental is a warm-metal fixture against a pale wall with the channel painted out, and a shade in undyed linen so the light reads warm at 2700K without going orange.
Installation step by step
Installing a plug-in sconce takes twenty to thirty minutes with a drill, a level, a tape measure and a pencil, and the only decisions that matter are made before the first hole. Follow the order below and the fixture will sit level, take its weight and hide its cord.
- Mark the height. Using the table above, mark the fixture center on the wall: 54–60 in (137–152 cm) from the floor for a bedside swing-arm, 60–66 in (152–168 cm) for a general wall sconce. Hold the fixture up and check from a seated position that the shade hides the bulb.
- Check the cord reach. Measure from the mark down to the baseboard and along to the outlet. If the total exceeds the cord length, usually 6–8 ft (1.8–2.4 m), move the fixture or use a different outlet; do not daisy-chain adaptors.
- Find a fixing. Use a stud finder to locate framing; a stud is ideal for a swing-arm. Where there is none, use a drywall anchor rated for at least three times the fixture weight, or a masonry anchor in brick. Fixtures under 3 lb (1.4 kg) on a smooth painted wall can hang from a rated removable adhesive hook.
- Level the bracket. Hold the mounting bracket or template at the mark, level it, and mark the screw holes. Drill, fit anchors if needed, and drive the screws so the bracket is snug but not crushing the drywall.
- Hang the fixture. Seat the backplate on the bracket or keyhole slots, check level again, and tighten any set screws. Fit the bulb and test before hiding the cord.
- Run and cover the cord. Route the cord straight down, fit the painted channel, add an elbow at the baseboard and run to the outlet. Plug in with a right-angle plug and add the inline dimmer or smart plug if you are using one.
- Restore on move-out. Peel the channel slowly, warming the adhesive with a hairdryer if it resists, fill the screw holes with lightweight spackle, sand and touch up.
Safety is simple but not optional: use only the bulb wattage marked on the fixture, keep fabric shades at least 2 in (5 cm) from the bulb, keep cords away from radiators and door frames, and unplug before changing a bulb. Anything beyond plugging in, such as converting to hardwired or adding an outlet, is electrical work that must follow your local code and, in most jurisdictions, be done or inspected by a licensed electrician.
Ready to fit one this weekend? Our shop edit lists plug-in swing-arm and fixed sconces in the finishes described here, and for ten rooms or more the sourcing desk will quote the same styles with cord sets made to your specification.
Free toolRug Size CalculatorFind the right rug size for your room and furniture.Shop & source the look
Buy it today — or have it made
Retail links are affiliate links: we may earn a commission at no extra cost to you (disclosure). “Get it made” sends the item to our sourcing desk for factory quotes in custom sizes and finishes.
Frequently asked questions
Are plug-in sconces safe?
Yes, when the fixture carries a recognized safety certification, the bulb stays within the marked wattage and the cord is routed in the open or in a channel rather than under rugs or through door frames. They are regulated as portable lamps, draw only a few watts with an LED bulb and need no permit. Replace any fixture with a damaged cord or loose lamp holder.
Can you convert to hardwired?
Often, but not as a DIY task in most jurisdictions. Many fixtures are sold in both versions and the internal wiring is the same, so an electrician can remove the cord, fit a junction box and connect the fixture to a switched circuit for roughly $100–250 per location. Converting the other way, from hardwired to plug-in with a cord kit, is simpler and more common.
Do plug in wall sconce need to be hardwired, or can they be plug-in?
They are designed to be plug-in and work fully that way: the same 300–800 lumens, any bulb, and dimming via an inline or plug-in dimmer. Hardwiring is only worth doing if you own the walls and want a wall switch with no visible cord. In a rental, keep the plug and hide the cord in a painted channel.
Can you install plug in wall sconce yourself, or do you need a professional?
You can install it yourself. The job is two screws or anchors, a level and a cord cover, and takes twenty to thirty minutes. A professional is only needed if you want the fixture converted to a hardwired circuit or a new outlet added behind it, both of which are electrical work governed by local code.
Is plug in wall sconce safe to use in a home?
Yes, in dry rooms with an ordinary outlet. Avoid using cord-connected fixtures within reach of a bath, shower or basin, where a damp- or IP-rated hardwired fixture is required, and keep cords out of children's reach and away from radiators. Use LED bulbs, which run cool, and unplug before changing them.
Some links may be affiliate links. Regulations and specifications change — always confirm with suppliers and qualified professionals.