Peel and Stick Wood Paneling: Types, Costs & How to Install
Peel and stick wood paneling comes in four types: real reclaimed planks at $6–12 per sq ft, veneer at $4–8, vinyl planks at $2–4 and foam 3D panels at $1.50–3. The adhesive bonds to smooth, primed walls and holds 5–10 years.
Part of our guide: Wall Treatments Guide: 14 Wall Finishes & Covering Ideas
Key takeaways
- Peel and stick wood paneling comes in four types: real reclaimed planks at $6–12 per sq ft, veneer at $4–8, vinyl at $2–4 and foam 3D panels at $1.50–3
- A 10 × 9 ft accent wall costs $180–1,100 in materials and takes two to four hours; nailed real-wood paneling runs $500–1,500 installed
- The adhesive holds 5–10 years on a smooth, primed, matte wall and fails on heavy texture, gloss paint, fresh paint and humid rooms
- Start on a level chalk line one plank up from the floor, stagger joints 6 in, press every plank with a J-roller and wait 72 hours before hanging anything
Peel and stick wood paneling is a wall panel with a factory-applied adhesive backing, so it bonds to a smooth wall without nails or glue. It comes in real reclaimed wood planks at $6–12 per sq ft ($65–130 per m²), thin wood veneer at $4–8, printed vinyl planks at $2–4 and foam 3D panels at $1.50–3. A 10 × 9 ft (3 × 2.7 m) accent wall costs $180–1,100 in materials and takes two to four hours to install.
The format exists for one reason: speed without tools. A real wood accent wall normally means a nail gun, a saw, a trip for lumber and a weekend; the stickable version arrives in a box, cuts with a utility knife or a miter saw, and goes up in an afternoon. The trade-offs are real, too. The adhesive is only as good as the wall under it, the thin products do not survive being moved, and the vinyl versions are convincing only in the right light. This guide separates the four product types, gives real prices and lifespans, tells you which walls it will and will not stick to, and walks through the install.
- Thickness: 1/32 in (1 mm) for vinyl planks; 1/8–1/4 in (3–6 mm) for veneer; 1/4–1/2 in (6–12 mm) for real reclaimed planks.
- Plank sizes: typically 5–6 in (13–15 cm) wide and 24–48 in (61–122 cm) long; 3D panels 12–20 in (30–50 cm) square.
- Adhesive: pressure-sensitive acrylic, rated for 1–3 lb per sq ft (5–15 kg per m²) of panel weight on a smooth primed surface.
- Lifespan: 5–10 years on a well-prepared wall; 1–3 years on textured or glossy walls.
- Removability: vinyl and foam remove with heat and leave residue; real wood usually takes the paint with it.
What is peel and stick wood paneling?
Peel and stick wood paneling is a family of wall products with a pressure-sensitive adhesive layer protected by a release liner; you peel the liner, press the panel to the wall, and the adhesive cures over 24–72 hours into a bond that does not need fasteners. The front face can be real wood, a wood veneer on a fiber backer, a printed vinyl film with embossed grain, or a molded foam with a wood pattern. Retailers group them under the same name, which is why so many buyers are surprised by what arrives.
The real-wood versions are the newest and the most interesting from a design standpoint. They are planks of reclaimed barn wood, pine or oak, planed to 1/4–1/2 in (6–12 mm), with an adhesive tape or sheet laminated to the back. They look exactly like a conventional wood accent wall because they are one; the only difference is how they are fixed.
What are the types of peel and stick wood panels for walls?
The four types of peel and stick wood panels for walls are real reclaimed or new wood planks, wood veneer on an MDF or fiber core, vinyl wood-look planks, and foam or polyurethane 3D panels. They differ in weight, price, realism and how forgiving they are of a bad wall.
| Type | Cost per sq ft | Thickness | Weight | Realism | Wall it needs | Lifespan |
|---|---|---|---|---|---|---|
| Real reclaimed wood planks | $6–12 ($65–130 per m²) | 1/4–1/2 in (6–12 mm) | 1.5–3 lb/sq ft | Perfect; it is wood | Smooth, primed, flat to 1/8 in | 10+ years; permanent in practice |
| Wood veneer on fiber core | $4–8 | 1/8–1/4 in (3–6 mm) | 0.8–1.5 lb/sq ft | Excellent | Smooth, primed | 7–10 years |
| Vinyl wood-look planks | $2–4 | 1/32–1/16 in (1–1.5 mm) | 0.2–0.4 lb/sq ft | Good at 6 ft, fair up close | Smooth or light texture | 5–8 years; removable |
| Foam / PU 3D wood-pattern panels | $1.50–3 | 1/4–3/8 in (6–10 mm) | 0.2–0.3 lb/sq ft | Fair; reads as molded | Smooth or light texture | 3–5 years; removable |
| Peel and stick slat panels (veneer on felt) | $5–10 | 3/4 in (19 mm) incl. slats | 1–2 lb/sq ft | Excellent | Smooth, primed | 7–10 years |
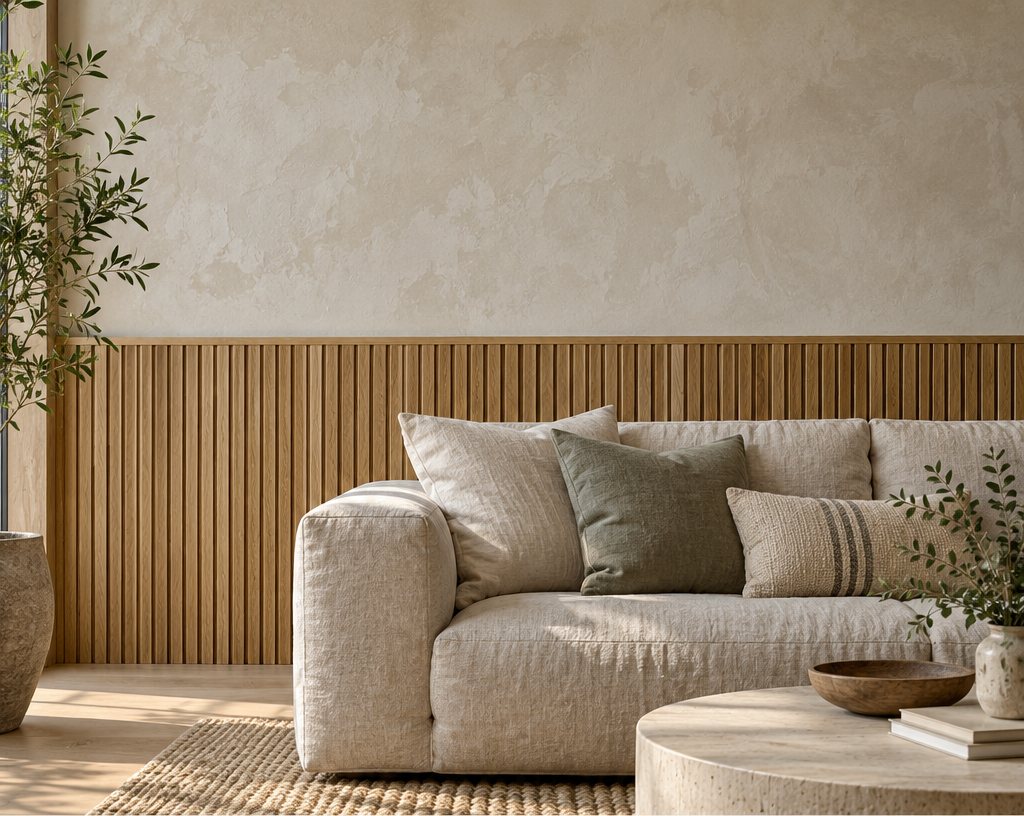
The slat version deserves a note because it is the one most people are actually looking for in 2027: wood or veneer slats on a felt backer with adhesive strips, which gives the look of wood slat wall panels without screwing through the felt. It is also the heaviest, so wall preparation matters most. Choose a wood species and tone that works with the floor using our guide to mixing wood tones.
How much does a peel and stick wood wall cost?
A peel and stick wood wall costs $180–1,100 in materials for a typical 10 × 9 ft (3 × 2.7 m) accent wall of 90 sq ft (8.4 m²), plus $30–60 for primer and a trim strip, and nothing for labor if you do it yourself. Hiring a handyman adds $150–400 for a half day. That compares with $500–1,500 for a nailed real-wood plank wall installed and $1,000–2,500 for a professional slat wall.
| Wall size | Vinyl planks | Foam 3D panels | Veneer planks | Reclaimed wood |
|---|---|---|---|---|
| Headboard wall, 8 × 4 ft (32 sq ft / 3 m²) | $70–140 | $55–105 | $140–280 | $210–420 |
| Accent wall, 10 × 9 ft (90 sq ft / 8.4 m²) | $200–400 | $150–300 | $400–790 | $590–1,180 |
| Large wall, 14 × 9 ft (126 sq ft / 11.7 m²) | $280–550 | $210–410 | $550–1,100 | $830–1,650 |
| Add 10% waste | Planks run short on random-length patterns; order one extra box for every eight | |||
Price per box is the number to watch, since boxes cover anywhere from 10 to 20 sq ft (0.9–1.9 m²). Divide the box price by its coverage before comparing, and check whether the coverage figure includes the gaps between slats, which some sellers count and others do not. For cheaper wall options in general, see cheap wall panels.
Will stickable wood panels stay on the wall?
Stickable wood panels stay on the wall for years when three conditions are met: the wall is smooth, the surface is clean and primed with a matte or eggshell finish, and the panels are pressed firmly and left to cure for 24–72 hours before anything is hung on them. The adhesive fails when any one of those is missing, and the failures are predictable: textured walls, glossy paint, fresh paint under 30 days old, damp rooms, and heavy panels on drywall paper that was never primed.
Which walls work and which do not
- Smooth, primed, eggshell or matte painted drywall: ideal for all types.
- Light orange peel texture: fine for vinyl and foam, marginal for veneer, not for real wood; the adhesive touches only the peaks. Skim the wall first or add a 1/4 in (6 mm) plywood backer.
- Knockdown, heavy texture, brick, block: no; use a backer board screwed to the wall and stick to that.
- Semi-gloss or gloss paint: scuff-sand to 220 grit and wipe, or the panels slide down over a month.
- Fresh paint: wait 30 days for latex to cure, or the adhesive pulls plasticizers out of the paint and lets go.
- Bathrooms and kitchens: vinyl and foam only, away from direct water; wood swells and the adhesive softens above 85 percent humidity.
- Rentals: vinyl and foam remove with a heat gun and citrus solvent; real wood and veneer generally do not come off cleanly, so treat them as permanent.
For heavy real-wood planks, many installers add a bead of construction adhesive or two 18-gauge brads per plank as insurance, which turns a peel and stick product into a conventional one but removes the risk of a plank on the floor at 3 a.m.
How do you install a peel stick wall panel?
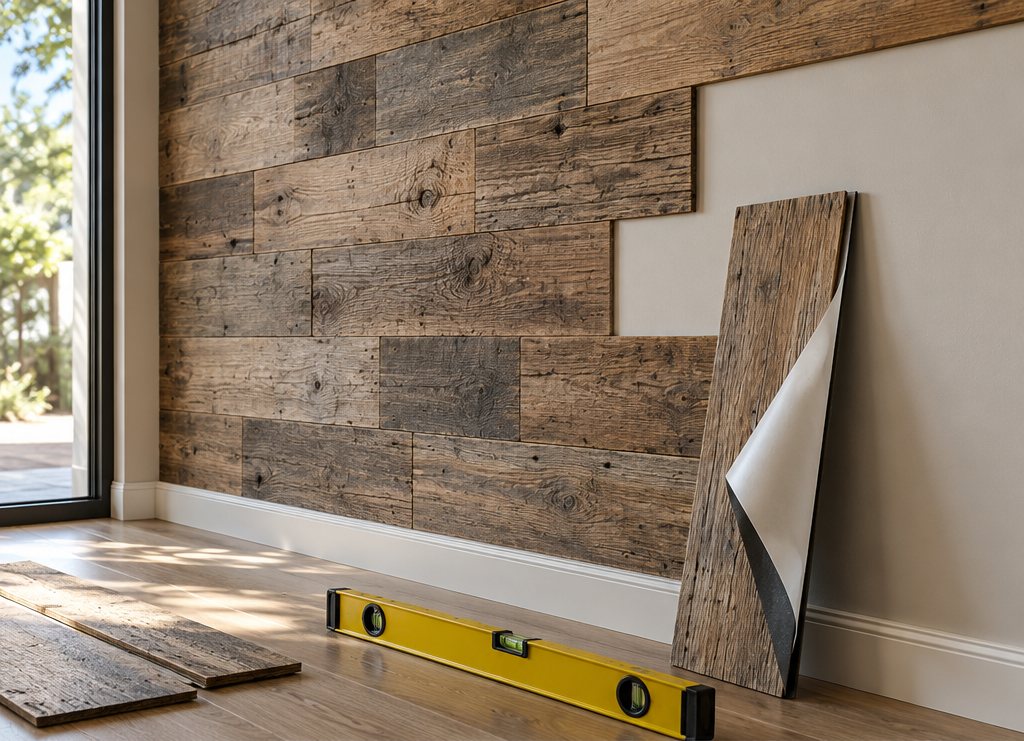
A peel stick wall panel is installed by preparing a smooth, primed wall, snapping a level starting line, dry-laying the pattern, then peeling, placing and pressing each panel in rows from the bottom up, cutting the ends with a miter saw or utility knife and rolling the whole wall with a J-roller when done. The full sequence for a 10 × 9 ft wall is below and takes two to four hours.
- Check and prepare the wall. Run a 4 ft (122 cm) level across the wall; any gap over 1/8 in (3 mm) needs filling. Fill holes, sand smooth, scuff glossy paint, wash with a mild degreaser and let it dry. Prime raw drywall or patched areas with a matte primer and wait 24 hours.
- Acclimate the panels. Open the boxes and stack the planks loosely in the room for 48 hours; real wood and veneer move with humidity, and planks that shrink after installation show gaps.
- Remove obstacles. Take off baseboards if you want the planks to run to the floor, or plan to stop at the baseboard with a trim strip. Turn off power and remove outlet and switch covers; you will fit box extenders later if the panels are over 1/4 in (6 mm) thick.
- Snap a starting line. Measure 1 plank height up from the floor at both ends, snap a level chalk line, and start on that line, not on the floor. Floors are rarely level; a level first row is what makes the whole wall look straight.
- Dry-lay the pattern. Lay out the first three rows on the floor, staggering end joints by at least 6 in (15 cm) and mixing tones from several boxes so no two similar planks sit together. For real wood, sort the boards into light, medium and dark and distribute them.
- Peel, place, press. Starting at the bottom corner, peel the liner, set the plank on the line, and press from the center outward with your hands, then with a J-roller or a wrapped block, applying firm pressure along the full length. Adhesive bonds with pressure, not time, so do not skip the roller. Butt the next plank tight to the first; leave a 1/16 in (1.5 mm) gap for real wood in humid climates.
- Cut the ends and the top. Cut vinyl with a utility knife and a straightedge, scoring twice; cut veneer and real wood with a fine-tooth miter saw or jigsaw. Measure each end piece individually, and use the offcut to start the next row. At the ceiling, rip the final row to width with 1/8 in (3 mm) of clearance and cover with a small trim.
- Finish and cure. Refit baseboards or add trim, fit outlet box extenders and covers, and roll the whole wall once more. Leave it 72 hours before hanging anything, and mount shelves and TVs through the panels into studs, never into the panel alone.
If the wall is textured and you decide to skim it rather than add a backer, follow how to smooth textured walls and allow a week for the compound to cure and get a coat of primer before sticking anything to it.
Where does a peel and stick wood wall look best?
A peel and stick wood wall looks best on one wall that frames something, a bed, a sofa, a TV or a dining table, in a room where the other walls are plain and the lighting grazes the wood. It is a feature-wall product; four walls of stick-on planks in a small room feels like a sauna.
- Behind the bed: the most common and most successful use. Run horizontal planks or vertical slats the width of the bed plus 12–18 in (30–46 cm) either side, floor to ceiling, in a tone a shade darker than the floor; pair with the bed heights in bedroom trends.
- TV wall: dark veneer slats hide the black rectangle and the cable channel. Add a low floating shelf on brackets screwed into studs.
- Entry wall: a half-height run of reclaimed planks with a row of hooks at 60–66 in (152–168 cm) survives bags and coats far better than paint.
- Home office backdrop: a 6–8 ft (1.8–2.4 m) wide panel of slats directly behind the desk, which reads well on video calls. See our home office design ideas.
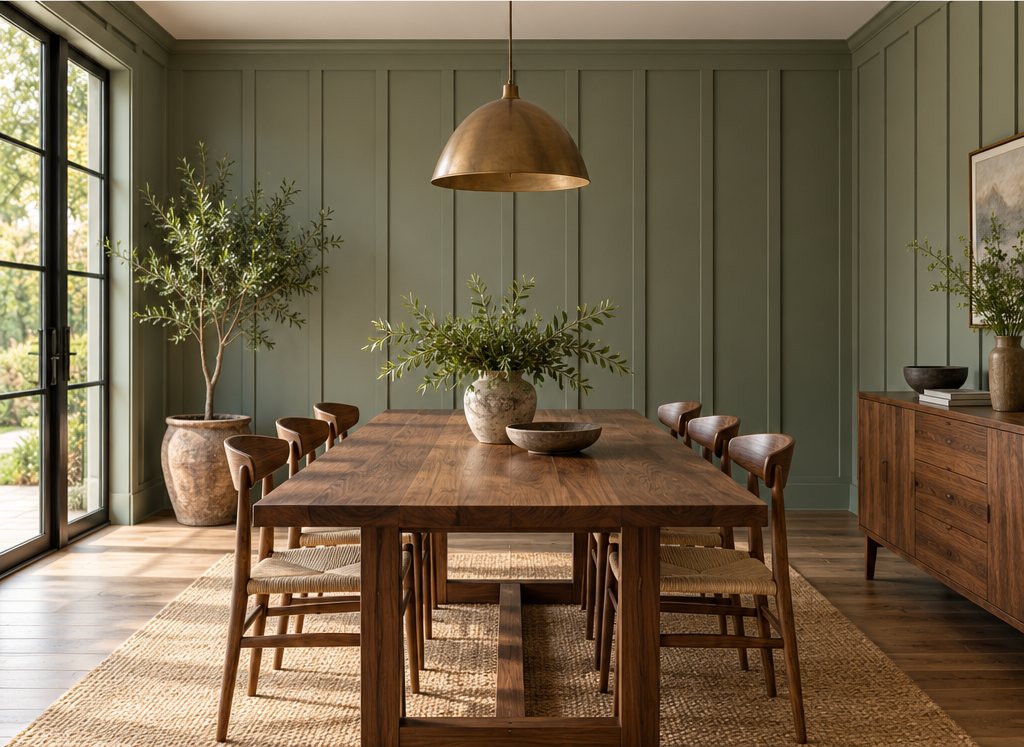
- Dining nook: horizontal planks behind a banquette, stopped at a 1 × 3 ledge at 36 in (91 cm) so the wood acts as a wainscot.
Light it from the side. A single wall washer, a sconce pair or a floor lamp set 18 in (46 cm) from the wall brings up the grain; overhead light from the room center flattens it to a brown rectangle. The lighting calculator will tell you whether the room's ambient level is low enough for the grazing light to read.
Peel and stick vs nailed wood paneling: which should you buy?
Buy peel and stick when you rent, want a feature wall this weekend, have no tools, or are covering a small, smooth wall; buy conventional nailed paneling when the wall is textured or large, the planks are heavy, you plan to stay more than five years, or you want to run the wood across several walls or around corners. The peel and stick premium is real: a real-wood stickable plank costs 30–60 percent more per square foot than the same wood sold loose, and you are paying for the adhesive and the convenience.
The quality signals to look for in any stickable wood panel are a continuous adhesive sheet rather than two thin strips, an adhesive weight rating stated per square foot, kiln-dried wood with a moisture content under 10 percent, an edge-sealed veneer, and a return policy that covers a sample box. Order one box, stick three planks to the actual wall, and leave them a week before ordering the rest; adhesion problems show up in days, not months.
Free toolPaint CalculatorWork out exactly how much paint to buy.Shop & source the look
Buy it today — or have it made
Retail links are affiliate links: we may earn a commission at no extra cost to you (disclosure). “Get it made” sends the item to our sourcing desk for factory quotes in custom sizes and finishes.
Frequently asked questions
Does peel and stick wood paneling really stick?
Yes, on the right wall. Pressure-sensitive adhesive bonds for 5–10 years on smooth, clean, primed drywall with a matte or eggshell finish when each plank is pressed with a roller and left 24–72 hours to cure. It fails on heavy texture, glossy or fresh paint, damp rooms and unprimed drywall paper, and heavy real-wood planks often get two brads per board as insurance.
How much does a peel and stick wood wall cost?
Materials run $1.50–3 per sq ft for foam panels, $2–4 for vinyl planks, $4–8 for veneer and $6–12 for real reclaimed wood. A 10 × 9 ft accent wall of 90 sq ft therefore costs about $150–1,100, plus $30–60 for primer and trim, and $150–400 if you hire a handyman for the half day it takes.
Can you put peel and stick wood panels on textured walls?
Thin vinyl and foam panels will hold on a light orange peel texture, but veneer and real wood will not, because the adhesive touches only the peaks. On knockdown, heavy texture, brick or block, skim the wall smooth and prime it, or screw a 1/4 in plywood backer to the studs and stick the panels to that.
Are stickable wood panels removable?
Vinyl and foam panels come off with a heat gun and a plastic scraper, leaving residue that cleans up with a citrus solvent; expect some paint damage. Real wood and veneer planks usually take the paint and some drywall paper with them, so treat them as permanent and do not use them in a rental unless you plan to repaint.
How do you install a peel stick wall panel?
Fill, sand, clean and prime the wall, acclimate the planks for 48 hours, snap a level line one plank height up from the floor, dry-lay three rows with staggered joints, then peel, place and press each plank with a J-roller working from the bottom corner up. Cut ends with a utility knife or miter saw, trim the top row, refit baseboards and leave 72 hours before hanging anything.
What is the difference between peel and stick wood paneling and shiplap?
Shiplap is a board profile with a rabbeted edge that overlaps the next board; peel and stick wood paneling is any wood or wood-look plank with an adhesive back. Many peel and stick products imitate shiplap with a printed or routed groove, but true shiplap is nailed. For a flat modern look, choose square-edged planks; for cottage style, the grooved shiplap-look version.
Some links may be affiliate links. Regulations and specifications change — always confirm with suppliers and qualified professionals.